5 Lessons Learned for iPad Event Videographers Publishing to YouTube
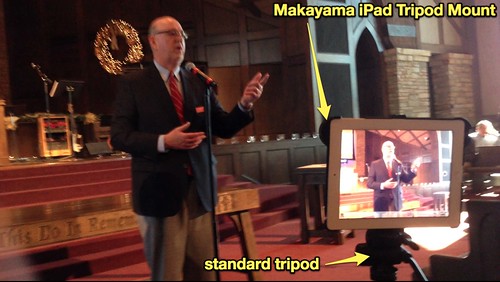
This morning our church had a congregational “town hall” meeting. Since this was a very important meeting and not all our members could attend, I volunteered to record the event and share it online on YouTube. Expecting the meeting to last about an hour, I came prepared with my iPad2, a Makayama iPad Tripod Mount, a standard camera tripod, and an iRig microphone. Instead of a traditional camcorder, I opted to record with my iPad because its “quick editing” features substantially accelerate the workflow required to both edit and share a video like this. In this post I’ll describe some of my lessons learned from this experience, which built on my July 2012 adventure using an iPad with Ustream (and eventually YouTube) to share a 1.5 hour lecture at our church. See my July 2012 post, “Webcasting with Ustream, an iPad, a Tripod & an XLR Boundary Microphone” for more details about that formative experience.
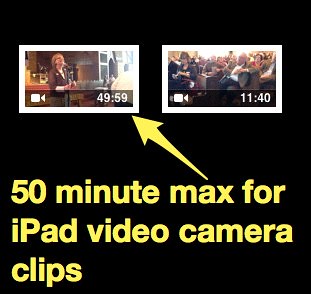
Lesson 1: iPad Video Clips are Limited to 50 Minutes
The biggest surprise and “lesson learned” from today’s video recording and sharing experience was that iPad video clips are limited to 50 minutes. I bought a 64 GB iPad2 for the specific purpose of having enough flash drive space / local drive space to record LOTS of video when needed, in situations just like today. Last night I spent some time deleting old, unneeded videos both from my iPad camera roll as well as the applications iPad for iMovie and Pinnacle Studio. That cleared out a little over 17 GB on my iPad, which I thought would be plenty of space for our hour-long meeting today. Fifty minutes into the presentation, however, my iPad video camera stopped working. I didn’t actually read the error message which popped up, and just assumed that the flash drive space was full. I pulled out my iPhone5 and used it to record the final twelve minutes of the presentation.
It turned out, however, that I had plenty of iPad flash drive space left. The 50 minutes of 720p iPad video took up about six GB of space, leaving me with about 11 more to spare. It worked out OK to record the remainder of the presentation on my iPhone5, since there wasn’t too much more, but if I’d realized the iPad has a 50 minute video clip limit I would have just pressed record again on my iPad after the first clip ended and continued recording with it instead of the iPhone. When I returned home and was ready to edit the video together, I transferred the 12 minute iPhone5 video clip to my iPad wirelessly using the PhotoSync app. Even though the iPhone5’s video was 1080p and the iPad2’s video was 720p, iMovie for iPad let me import both into the same project and combine them together for publishing on YouTube.
Lesson 2: iMovie for iPad Won’t Upload Videos Longer Than 15 Minutes to YouTube
Even if your YouTube channel is approved for video uploads longer than 15 minutes in length, as mine is, there is no way to overcome iMovie for iPad’s default restriction on YouTube uploads.
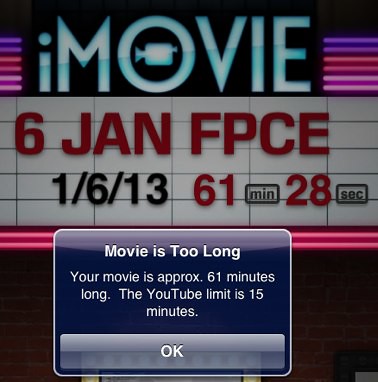
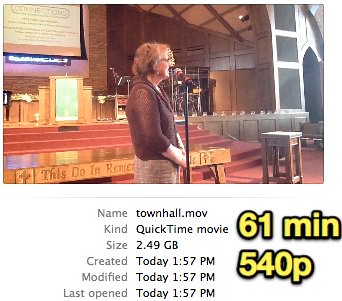
Since I couldn’t directly upload the final 61 minute video directly to YouTube from my iPad, I chose to save the final video to my iPad camera roll. I then used the free Mac app “Image Capture” (which comes pre-installed on all Apple computers) to import that video onto my laptop, and uploaded to YouTube via the Chrome web browser. If you know of an alternative way to upload videos longer than 15 minutes directly from an iPad to YouTube, please let me know. The app PixelPipe used to allow this, but it was discontinued / pulled from the app store in March 2010. Google has released a new YouTube Capture app for iPhone, and it does run on the iPad, but (from what I can tell) it does NOT allow you to combine more than one video together before uploading as iMovie for iPad does. I was VERY pleased with how speedy editing was with iMovie for iPad in this project. We had lots of questions from the audience during the second half of the presentation, and I was able to use the app’s “video split” features to isolate portions where people were asking questions without the benefit of a microphone. I then boosted the audio level of those clips to the maximum permitted by iMovie for iPad. The result wasn’t a perfect audio track, but it did make a big difference in making those audio portions more intelligible.
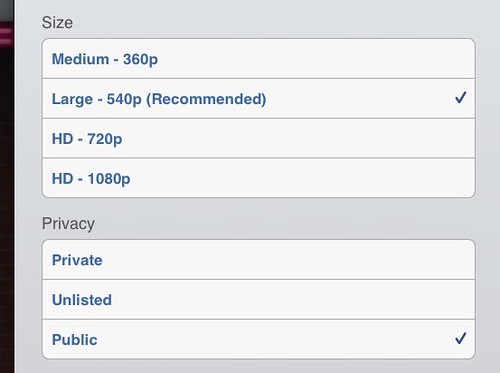
Lesson 3: Stick with 540p for Long YouTube Video Uploads
Even though I could have exported today’s video in 720p (high definition) I opted for 540p. This decision drastically sped up not only the time required to export the video to my iPad camera roll, but also the time required to upload it to YouTube and for it to convert for online viewing.
The final, combined video I made is 2.5 GB in size. That is HUGE, but it’s amazing this is a “workable filesize” given the capabilities of the iPad2, YouTube, and my home cable modem Internet connection. It took over an hour for this file to upload and convert on YouTube. (I’m not sure of the exact time because I went to the grocery store after I started the upload.) Since my home Internet bandwidth isn’t “metered,” however, all of this cost me exactly ZERO dollars to do and share today.
I recommend you stick with the 540p video quality setting at this point for most YouTube uploads, but DEFINITELY when you’re uploading something longer than an hour as I was today. I have published a few high definition videos to YouTube from my iPad (like our family Christmas card this year) but generally I have found the quality of the lower resolution settings to be more than adequate for my needs / purposes.
Lesson 4: iRig Mic is Great for Lecture Recordings
I probably could have obtained a very decent video recording today on my iPad without an external microphone like an iRig, since the built-in mic on the iPad is high quality. I chose to record with an iRig on the “high sensitivity” setting today, however, because in the past I’ve found it produces a higher quality sound. If you have an iRig and use it like this, you do NOT want to move it around a lot. I’ve made the mistake of moving a stationary iRig placed on a table around during video recording, and that can produce loud, distracting noises. Today I just handheld the iRig during the presentation and it worked well.
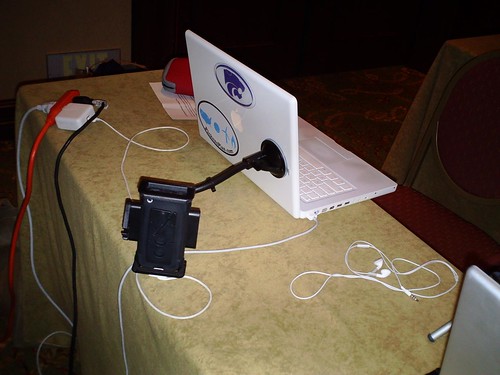
Lesson 5: An iPad Tripod Mount is Mandatory
The #1 most important accessory for my iPad event videography today was the Makayama iPad Tripod Mount. This is the only iPad tripod mount I’ve seen to date, and while it’s relatively costly ($70 US) it’s worth every penny. I have tried to handhold my iPhone for extended conference sessions that I’ve recorded in the past, and I can promise you that gets old FAST. Back in 2007 I tried a “guerrilla tripod setup” at CoSN in Austin using my iPhone with Ustream, and the results were mixed at best.
My advice: Get an iPad tripod mount like the Makayama if you’re going to video extended events. I bought a Glif tripod mount for my iPhone4 a few years ago and have been very happy with it. If you’ve used other standard tripod mounts for the iPad or iPhone I’d love to hear about your experiences. Those are my iPad event videography lessons learned! If you’ve tried iPad video recording for longer events, what other recommendations have I left out that you’d share with others?
There’s a new option for an iPad mount. Much less costly, too. People are backing our crowdfunding effort for the ArchMount. Check it out at http://www.kickstarter.com/projects/serialkickers/archmount-the-sturdy-ultraportable-tripod-mount-fo (or http://kck.st/WC5izH shortlink). Thanks!
Hi Wesley,
One solution to lesson #2: Use the Youtube Capture app to upload the video you saved to your camera roll from iMovie. Works a peach!
You can record longer than 50 minute video clips with your iPad however the camera has to be in the forward facing position. I’ve recorded a 60 minute class before in this manner.